Thursday 20 May 2010

Hot Air Balloons and Church Model

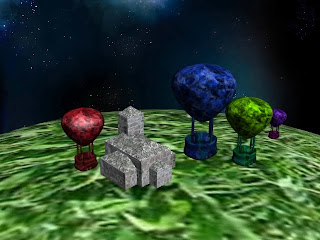
To better practice my UVW Wrapping skills, I created simple shapes which need better wrapping techniques to make them look more lifelike. I chose an angular building (church), which is made up of many different parts all attached together after working with the textures.


I used two hand-created textures for the church - one which represents old brick and one which represents old slate tiles for the roof sections. I used the UVW Unwrapping process to ensure the roof was a different texture to the brickwork, in the hopes of making it look more realistic. The hot air balloons also depict my own hand-made textures, but they deliberately look a little more wild and colourful, rather than going for attention to detail as I did with the church.
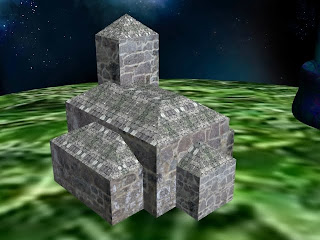


I have found that it is incredibly fiddly and time-consuming, but the end results are quite positive. The Grassy background is simply just to make it look like it is actually standing on something, so I'm not too fussed that it doesn't look quite as realistic. Maybe if I were to include this as part of a portfolio, I would work a little more on making the grass look more like grass, rather than greenish blurs. But as my main focus for this post is the building itself, I don't mind too much at the moment. It's something I will work on at a later date.

UVW Unwrapping

This is a screenshot of the UVW Unwrap process I have started. I plan to incorporate a new texture, combining a more metalic looking texture with a more organic looking texture. This is to help make it more obvious that it is actually a built space-ship.

To do this, I created the two separate Textures using Adobe Photoshop and combined them using an Overlay alteration so as to see both at the same time and be able to work with them together.


I then had to go into 3D Max and add a UVW Unwrap Modifier. Next, I went into the 'Edit' and used the 'Flatten Mapping' tool to smooth out and separate the individual pieces of my model. I then used Print Screen to copy this model structure over into Photoshop to work with it.

Finally, it was simply a matter of altering the different sections with my two textures (Shown in the screenshot below after taking out the UVW Breakdown), before saving it as a total texture and using the 'Materials' tool in 3D Max to wrap it around my model.

The image at the top shows the above texture wrapped around the small part of my model. After creating this one, I shall use the same process to create similar textures to wrap around the other sections.