Thursday, 18 March 2010

3D Spaceship Contd ...

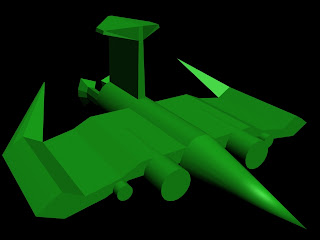
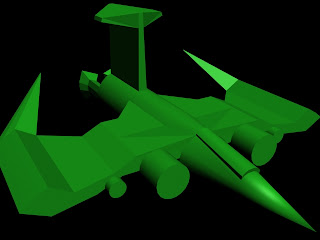
I have further developed my 3D Spaceship model to include a propeller and textures. The texture I have created using Adobe PhotoShop, with a combination of different Fractal and Smoke Brushes, plus multiple colours. The image has also had Hue and Saturation altered slightly to make it less of an eye-sore.

For the propeller, I have created a simple metallic texture and overlayed using the 'Material Editor' tool in 3D Studio Max. For the ship itself, I wanted to go for more organic, natural colours, and so chose to create a texture that reflects plant-life and nature : containing green and brown tints. Initially, the texture looked rather stretched and unprofessional over the pointed area above the propeller. Therefore, to amend this, I created a Sphere, altered the shape using a Taper tool, and then textured this with the same material. This has covered up the area that was troubling me, and also helps to even out the point (which I didn't think looked all that organic in the first place).


My next step for this project is to look into lighting and shading. Perhaps I can create a 'greenhouse' effect for the mushroom shapes on the model? We shall see, soon enough ...

Thursday, 11 February 2010

Today, I've been working a little more on my 3D Max model of a spaceship. I have adjusted the original, cloned it a further 3 times and started altering the joints between the domes and the stems. I will use the process of welding to get them roughly together, and then will delete un-needed polygons and re-create them in a more orderly, tidy fashion.

Thursday, 14 January 2010

As part of my course, I have been asked to make an Interactive CD-ROM. I have decided to do one based on the hit TV-Show: 'Doctor Who'. This is because I have easy access to a lot of its assets - in the form of images, episodes, audio files, etc - and also, most importantly, because I totally love the series. I intend to focus more on the regenerated style that will suit the new series airing in March, so this project will be a bit like a promotional CD-ROM for the show.

I have combined my skills with Premiere Elements, PhotoShop and Flash to create this welcome screen :-


It includes a High-Definition version of the 2010 series trailer, starring Matt Smith. I have used PhotoShop to create the background, edit the logo, create the 'CD-ROM' banner and add in a video border. I then used Premiere Elements to alter the video to get it the best possible quality. In the end, it had to be exported as an .flv file (flash video file) which only plays through the Flash programme. However, I'm hopeful that this will not stop the video playing when it is finally transferred onto a CD-ROM.

Finally, after exporting all layers from the Photoshop file into PNG-24 files (with transparency), I then created a new Flash file and imported everything over, arranging it as I want it and adding in the trailer.

I'm really happy with how this has turned out. I will use the same sort of style for every other page to make keep with continuity throughout.

Thursday, 10 December 2009

3D Max Plane


To create this 3D model of a plane, I created a cylinder, turned it into an Editable Mesh, and used a collection of different alteration methods to extrude, move, resize and weld different sections into the rough shape of a spacecraft.

To make the craft identical on both sides, I created one side of the craft, and then used the 'clone' method to copy it. Finally, I hit the 'Mirror' button to create the finished product and attached and welded the sections together to make
one final model. For the image below, I took the same file as above, altered the wings slightly to reduce the width of them and also used an extrude and 'Bevel' tool to create a small area at the front for the cockpit.

Thursday, 5 November 2009

Creating a 3D Toy in Max


This is a simple 3D toy which I have created using 3D Studio Max. To create it, I have used skills such as Bevel, Extrude, Weld and Attach. I have created a number of different shapes - including squares, cylinders, cones and circles, and then extruded parts to extend them, welded parts together to tidy everything up, and attached each of the shapes together to make it complete. In this Render, it doesn't look quite as good as my model, as there is a cone which goes between the head and the body - it doesn't show up in the render, though.

I got the idea to create this, as I used to play with 'wind-up' toys a lot when I was little: an example of which is found in this next image. I found them very entertaining.

With this 3D Model, I wanted to create a wind-up toy which would move (thanks to the wheel at the front). However, this would take a great deal more work before it is complete and 'useable'. As it is, the wheel wouldn't move, for instance, because the body resting on it is too 'square'. It would just drag along the floor if it worked at all. To make it more realistic, I would have to remove any part that could impede on movement, and would also probably need a second wheel at the back to help support the model. Also, I would want to make the 'wind' look more like the ones I used to use, rather than having it a simple square.
Considering this has taken me a few hours and it is still very basic, I would imagine it could take days or possibly even weeks to come up with a finished, final, professional model for a toy of this style.

If I have more time on this, I would like to round off the model and make it a little bit more realistic in terms of usability - remove the barriers stopping it from potentially moving and just tidy the whole model up.

Monday, 2 November 2009

3D Modelling - The Pumpkin

Using a tutorial to refine the more complex parts of this model, I have managed to create a Halloween Pumpkin using 3D Studio Max. I am very happy with how it has turned out, and considering I have only been playing with Max for a couple of weeks, feel very proud of this achievement.

With a little support from my Tutor, Chris, I managed to add in some suttle lighting effects, with the intention of making it look that little bit more 'creepy'. I feel it has worked.
The only negative is it is a little dark against the black background, but when I tried to amend this, it lost the 'spooky' feel I was going for as it was too illuminated.

But other than this, I am really happy with this model. Not only was it successful, but it was also fun to make, as well.

Thursday, 8 October 2009

Unit 64 - Box Modelling in 3DS Max - House


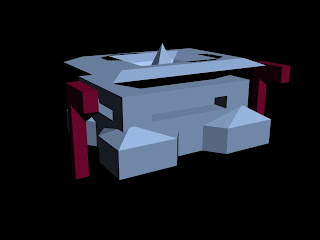
To create this house, I first created a simple box shape and turned it into an Editable Mesh. I also had to enable the edged faces, to 'segregate' the many individual sections. This allowed me to Extrude and Bevel specific squares to create different shapes (such as the pointed roof shape and the side extensions).

I have discovered that by adding multiple shapes and boxes, larger, more complex creations can be made. A box is turned into a specific object which links to the image as a whole (my example being two simple-looking street lamps being created using individual boxes but adding to the whole piece).